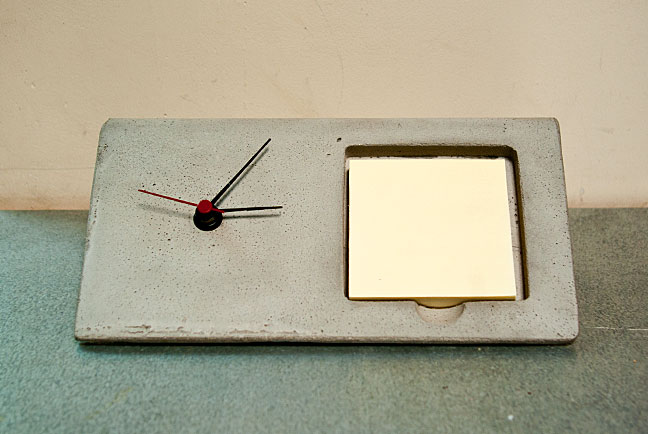
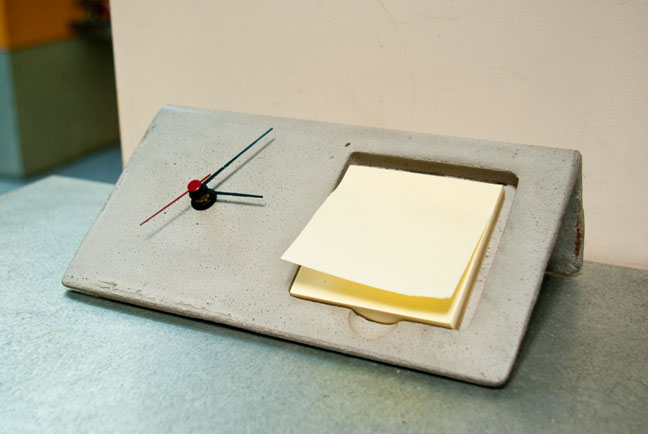

Bent Clock
Materials + Supplies:
• Plastic Sheet
• 1" Thick Insulating Foam
• Spray Adhesive
• Clear Tape
• Cardboard
• Clock Mechanism
Tools:
• Utility Knife
• Diamond Hand Sanding Pad
Size: 9" x 5" x 4" high
Color: Grey
Technique: Formed
Bent Clock
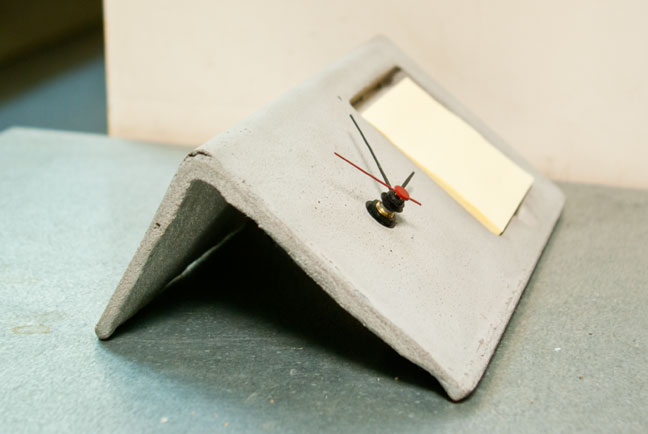
ShapeCrete has a unique property of being able to bend into shape. In this project we will pack the mix around a clock form, and then bend it into shape after it's had a few minutes to set up.
This project will show you how to make a clock with a place for post-it notes. All you need is a sheet of plastic, part of a pencil, some foam knockouts, a clock mechanism, and a few pounds of mix.
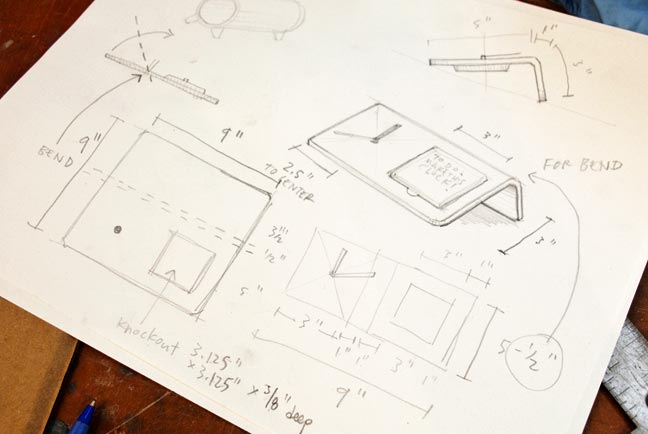
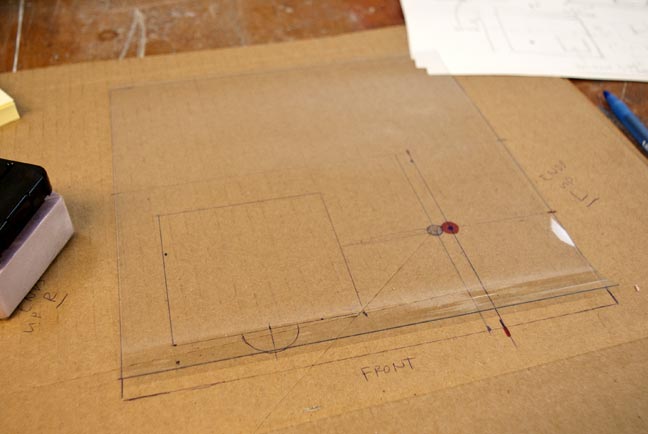
The Plan:
Foam knockouts create the void for the clock mechanism (on the back side) and a space for the post-it notes (on the front).
The total cut size of the plastic is 9"x9".
The knockout for the post-it notes is 3-1/4" x 3-1/4" x 3/8" deep.
The knockout for the clock mechanism knockout 2-1/2" x 2-1/2" x 3/8" deep.
The location of the center of the clock mechanism is about 2-3/8" from the edge, and about 2-1/2" up the piece of plastic.
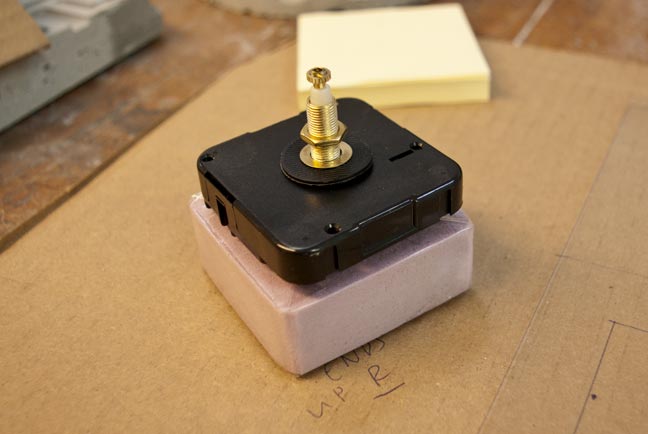
STEP 1: Clock Mechanism Knockout
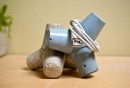
Trace around the clock mechanism on a piece of styrofoam (at least 1/4" thick). Cut out the foam and tape around it. This piece of foam will create a void in the piece for the clock mechanism to fit into. The foam used here readily available pink insulating foam, about 1" thick.
STEP 2: Make the Form
Cut a 9"x9" piece of clear plastic. The plastic shouldn't be too rigid, otherwise it won't bend.
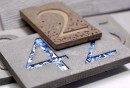
It helps to make some marks underneath the plastic on the cardboard so you know where to place the different knockouts. Any marks made on the plastic will need to be erased or they will bleed into the concrete.
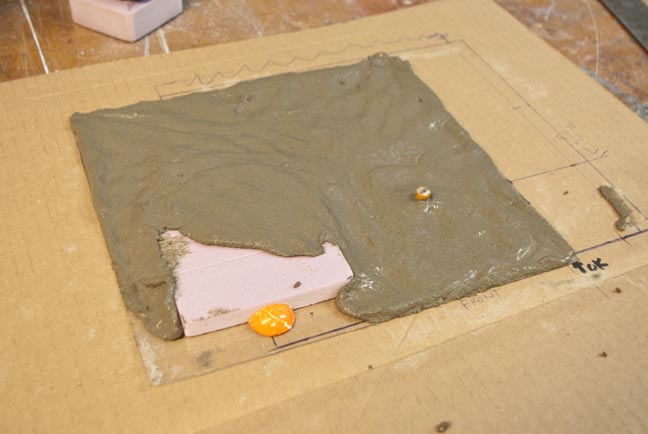
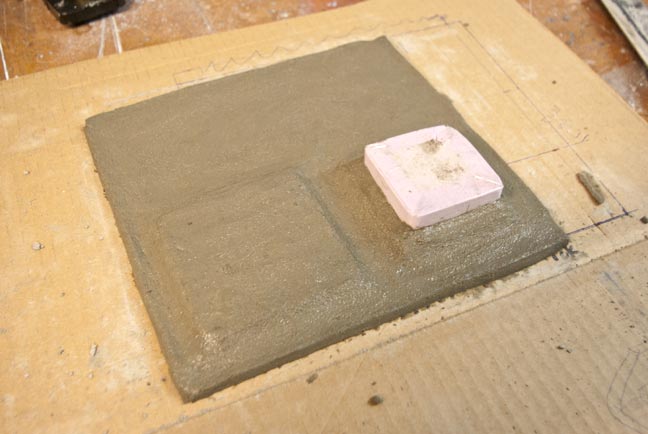
Use spray adhesive to glue the post-it knockout foam onto the plastic. A small bouncy-ball is cut into quarters and glued just below the foam to create a groove to make it easier to remove the post-it notes. A small section of pencil is glued on the other side - this will create the hole for the clock mechanism to pass through.

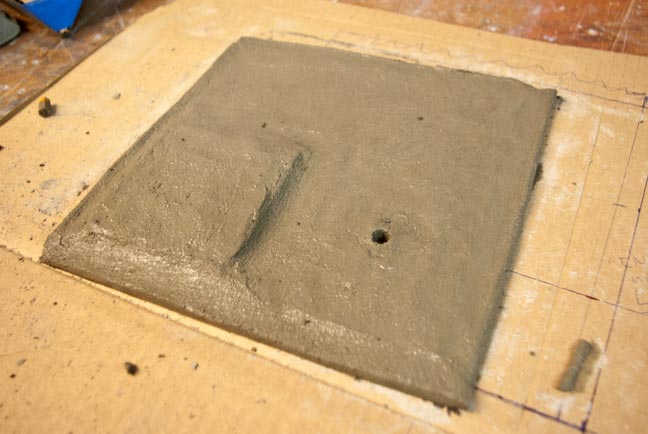
STEP 3: Mix and Pack
Mix ShapeCrete to a Clay-Like Consistency and pack it onto the form. Try to maintain a uniform thickness of about 1/4". Use a trowel to slice and smooth the outside edges.
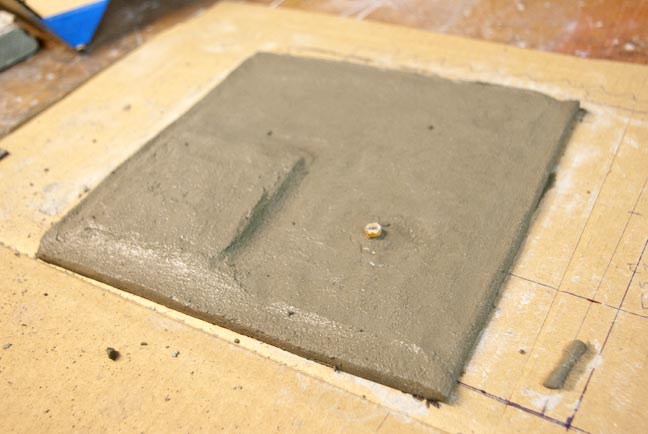
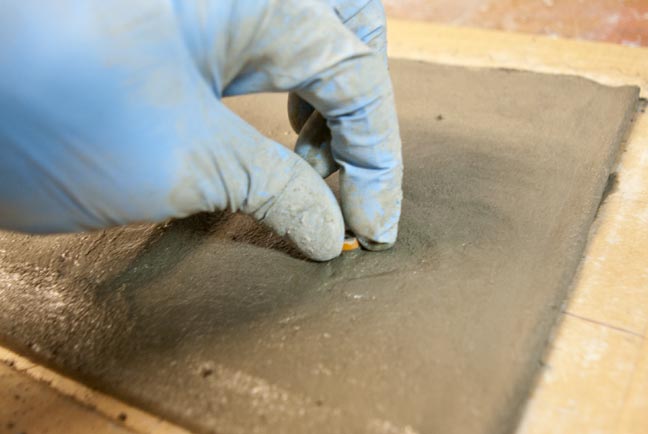
STEP 4: Remove Pencil
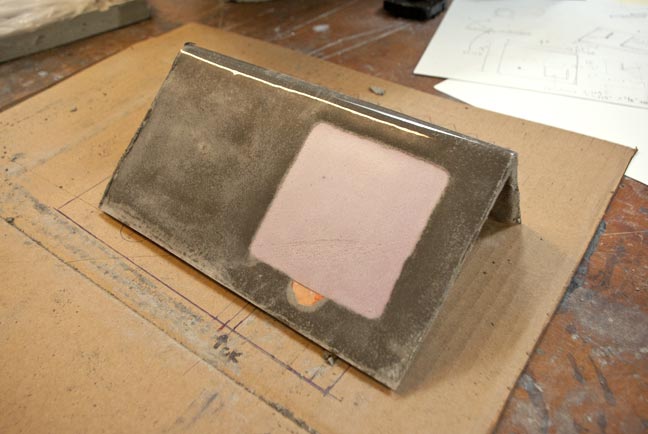
After the piece is fully packed, remove the pencil. Now there will be a hole in the piece. Place the clock mechanism knockout on top of the hole, trying to keep the hole in the center. Pack up the mix around the outside of the foam to capture the knockout. When the knockout is removed there will be a place for the clock mechanism to fit.
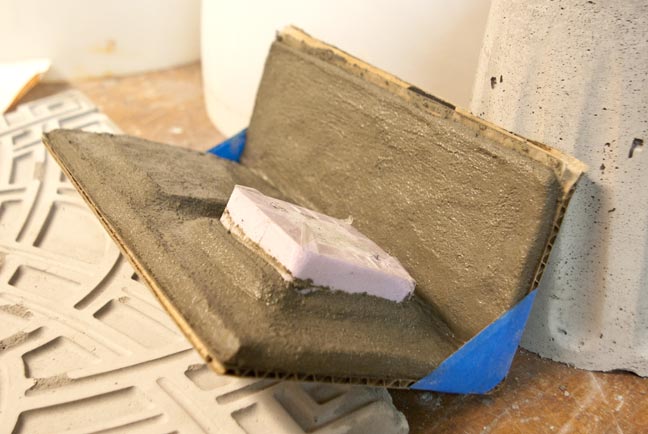
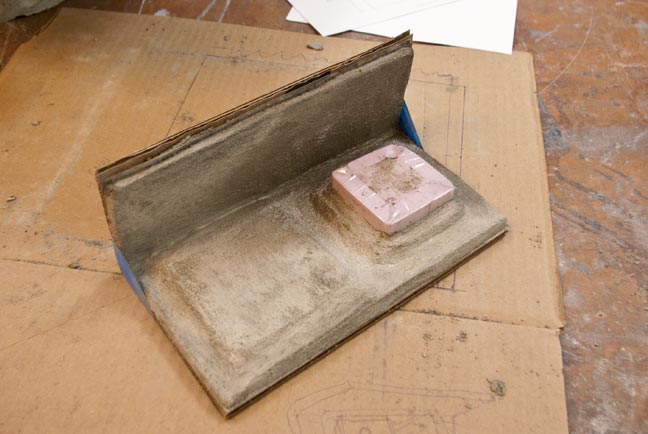
STEP 5: Bend It.
After the piece has set up for a few minutes, it can be bent. Make sure the corrugated lines of the cardboard run horizontal to the piece so the cardboard is easy to bend. Have a few pieces of tape ready, bend it into shape, use the tape to hold it in place, and leave it to cure overnight. Cover it with plastic.
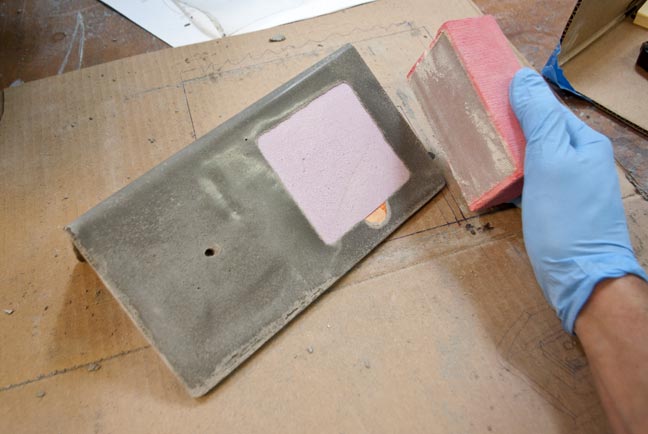
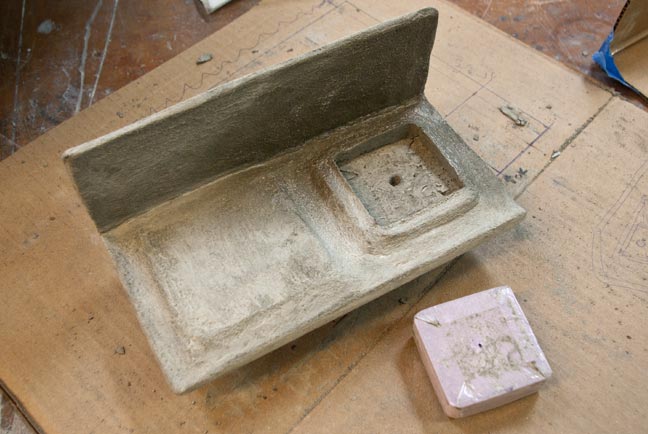
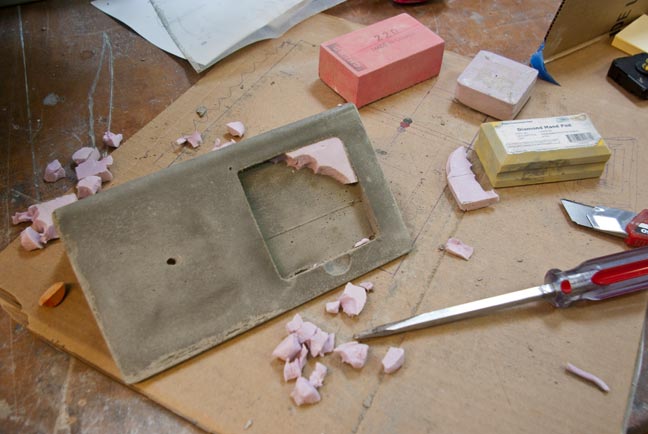
STEP 6: Demold and Finish
Be careful not to crack the piece when removing the form. After one day it will be strong enough to remove, but if it is thin and you're not careful, it could break along the bend.
Remove the cardboard and peel away the plastic. Dig out the foam knockouts with a screwdriver. Clean up the edges with a diamond hand sanding pad.
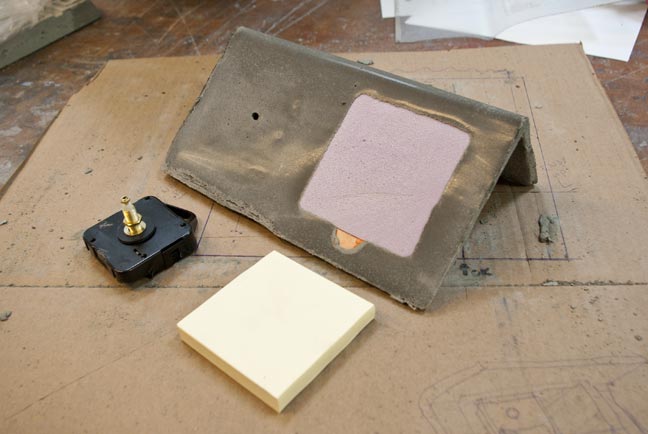
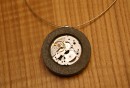
STEP 7: Clock Mechanism
Test fit the clock mechanism. If something doesn't quite fit, use files to grind it

Featured Projects