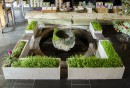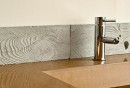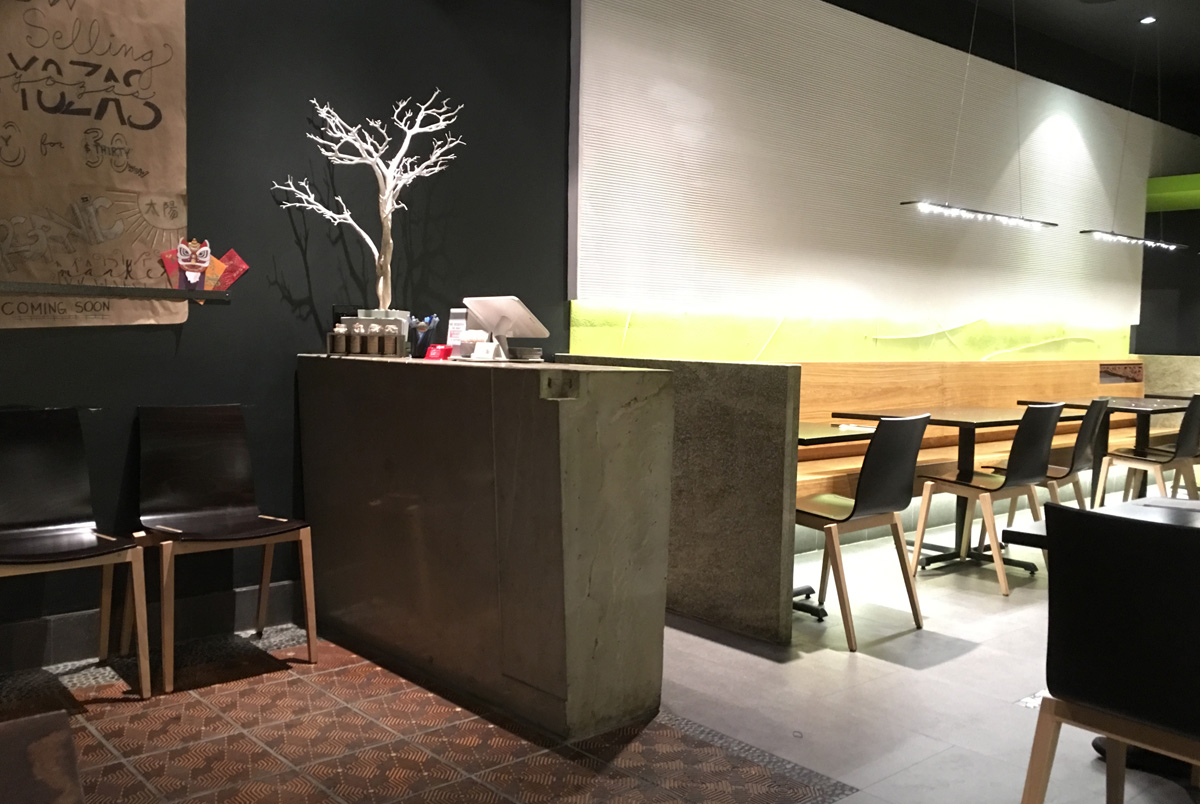

Hostess Station for Green Zone
Materials + Supplies:
• 3/4" High Gloss Laminate Form
• Fiberglass Mesh
• Basalt Rebar
• 300 lbs. ShapeCrete
• Portabella SmartColor Pigment
Tools:
• Table Saw
• Corded Drill and Mixing Paddle
• Trowel
• Diamond Hand Sanding Pads
Size: 5' x 4' x 18"
Color: Portabella
Technique: Hand Packed
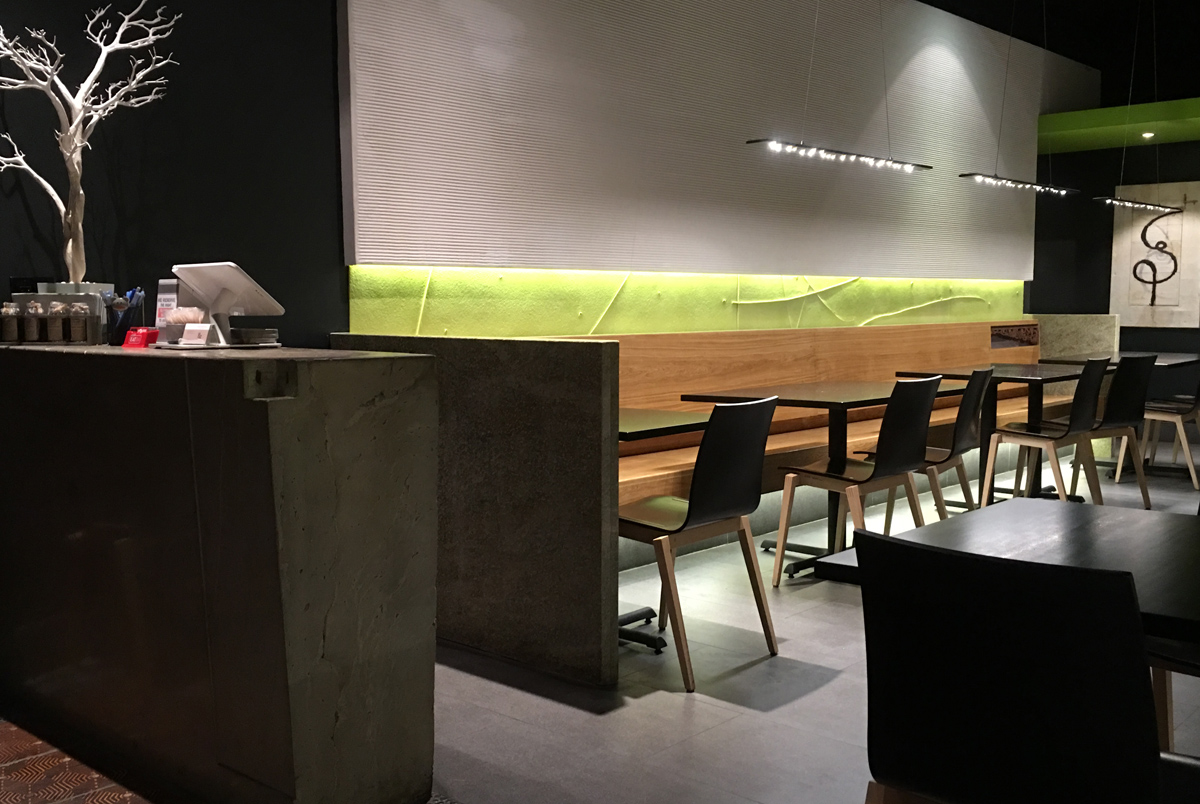
Hostess Station for Green Zone
With ShapeCrete you can make large scale projects without needing specialized equipment like sprayers or drum mixers, and without the need to build a heavy duty form or advanced GFRC mixes.
Fu-Tung Cheng designed the hostess station for Green Zone Restaurant in Los Angeles. It uses about 300 lbs. of ShapeCrete, mixed in smaller batches, and hand packed into a simple 3/4" laminate form. With just a few helping hands the form was packed in just over an hour.
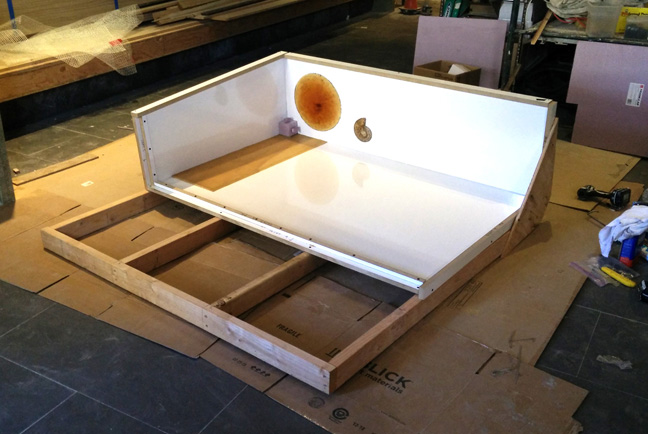
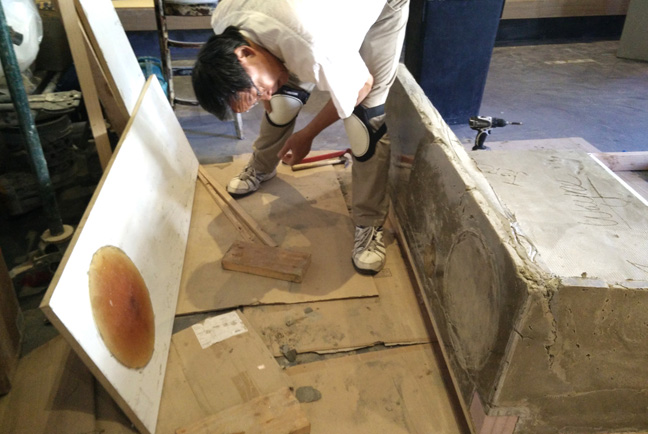
STEP 1: Forming
The form is built out of high gloss laminate. It's approximately 4' x 5' x 18" deep and open on the end where it meets the wall. The edge of the form has a 1" lip to help maintain an even thickness when the piece is packed with ShapeCrete.
.jpg)
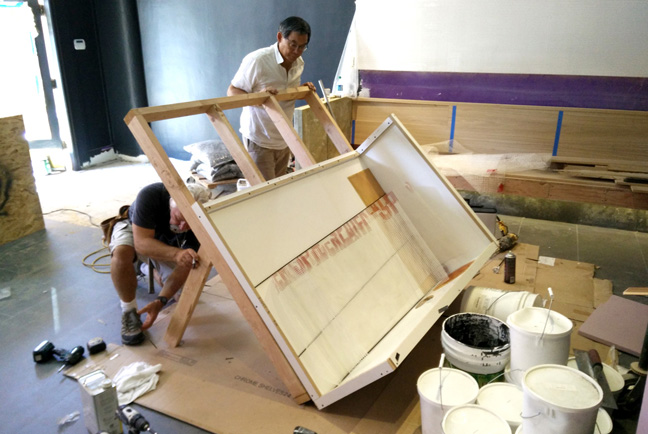
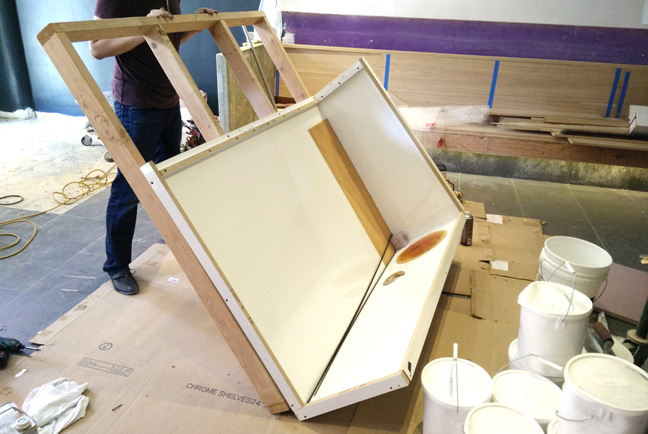
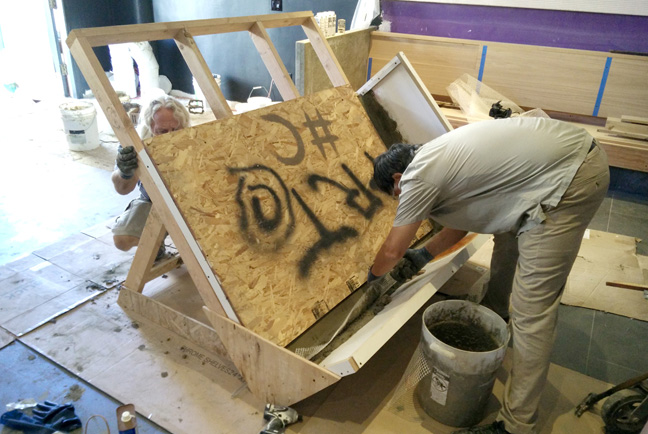
STEP 2: Tilting Frame
A simple jig built from 2x4s is used to help rotate the form as each individual wall is packed.
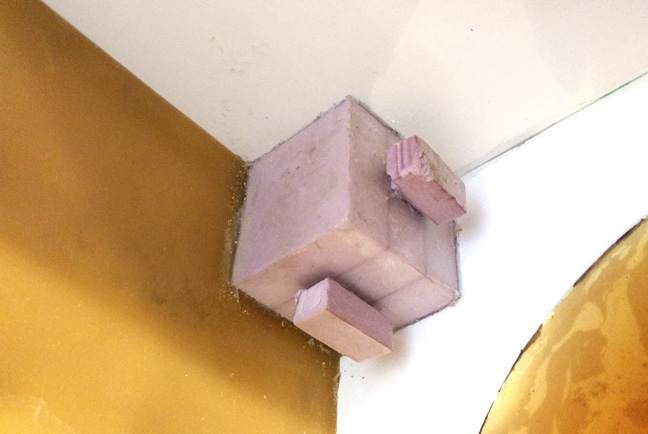
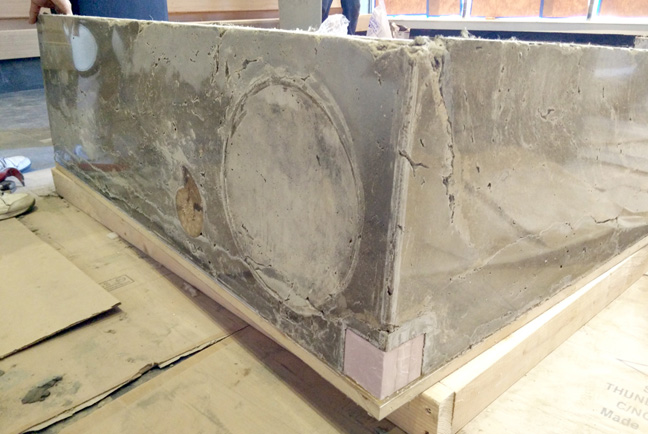
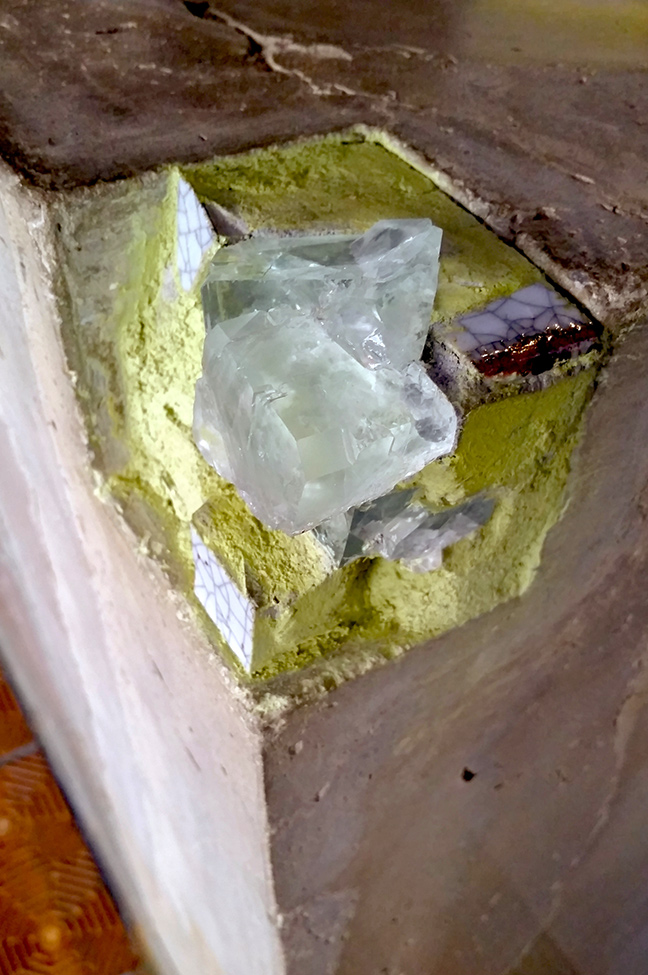
STEP 3: Form Details
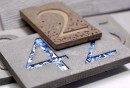
The interior of the form is detailed with rubber stamps and knockouts, fossil inlays, and embedded minerals. Each detail adds interest to the piece and plays off the decor of the space.
Rubber molds are stuck in the form with spray adhesive or silicone. The long rubber mat will give the piece texture in that area, and the disc shaped knockout will form a concave depression in the top of the piece. For tips on creating your own rubber molds, check out the Wood Grain Backsplash project.
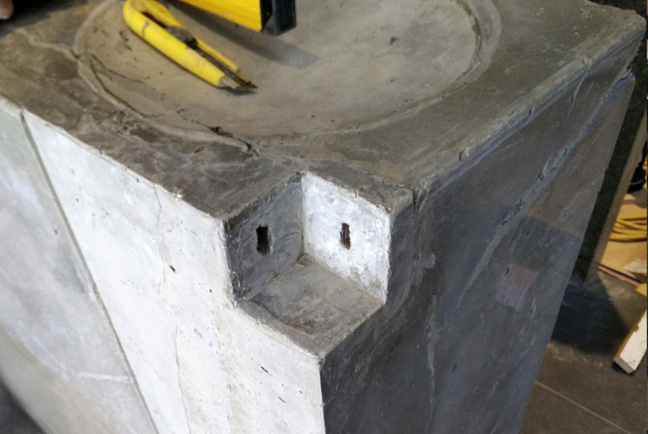
A foam knockout is placed in the corner and will create a ledge for a piece of Florite to be glued in place.
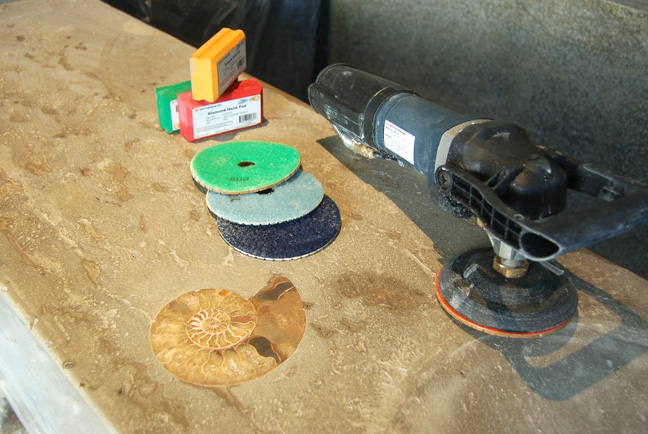
The final detail is an ammonite fossil that will be embedded in the top surface of the hostess stand. It's held in place with silicone caulk.
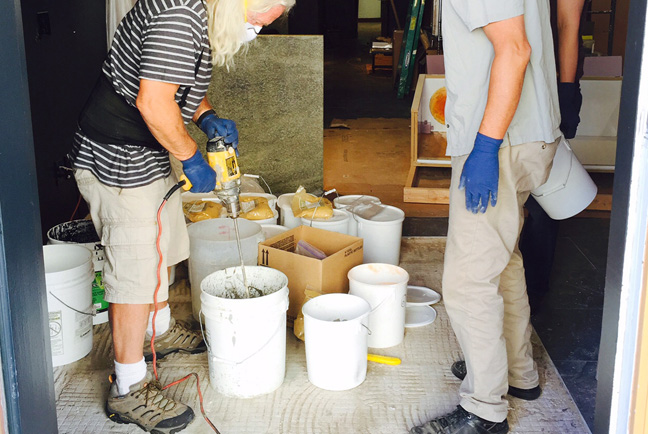
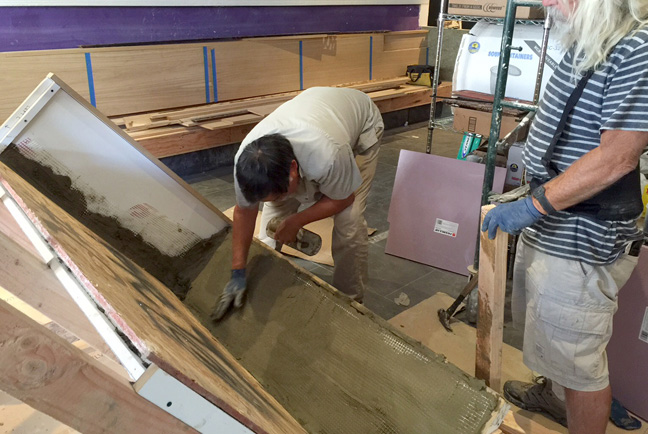
STEP 4: Mixing
This piece was cast from approximately 300 lbs. of ShapeCrete. Each batch was mixed using a paddle mixer on a corded drill, and each batch is pigmented with Portabella pigment from the CHENG SmartColor system.
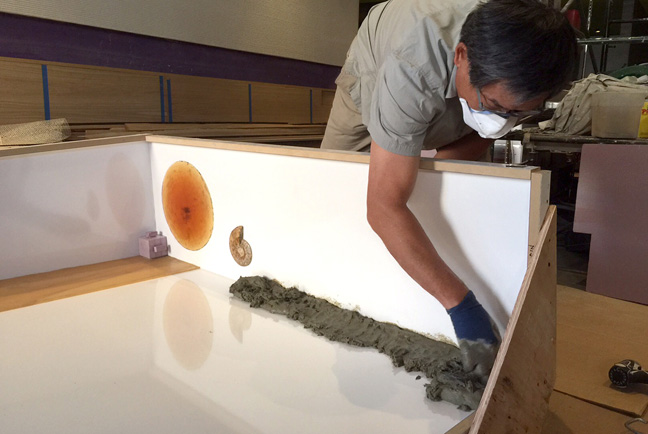
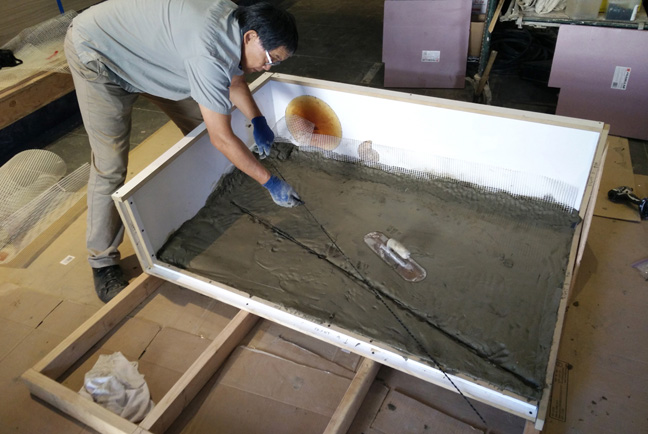
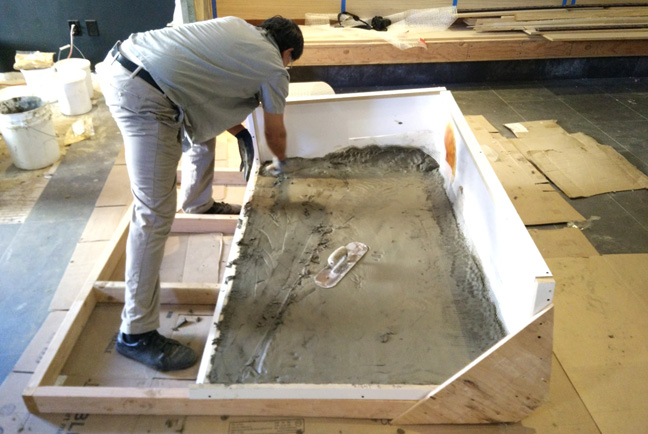
STEP 5: Pack the Form
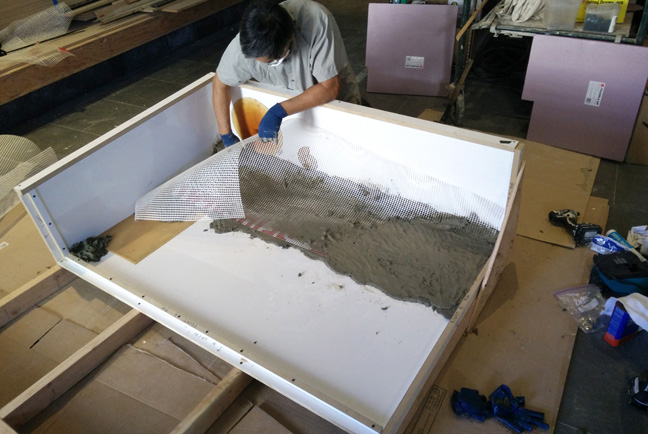
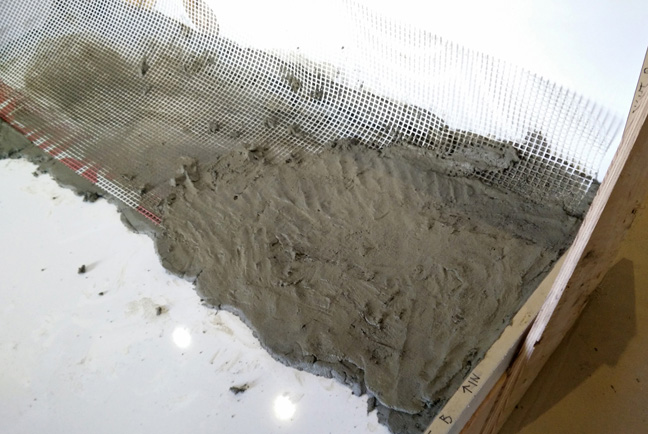
The largest side of the form is packed first. The mix is pressed into the edges of the form, making sure there are no large air pockets. As one section is packed, fiberglass mesh is troweled into the surface.
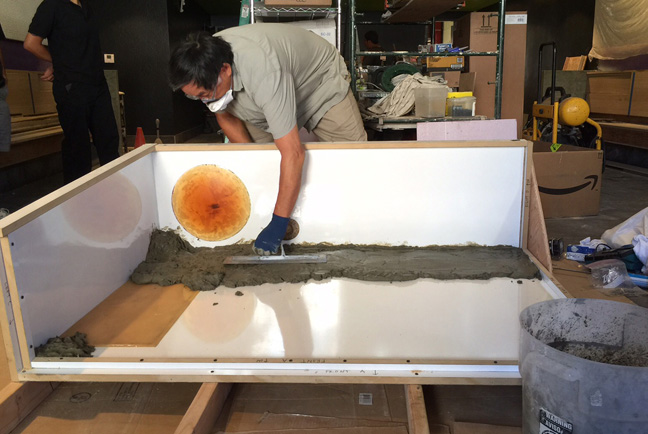
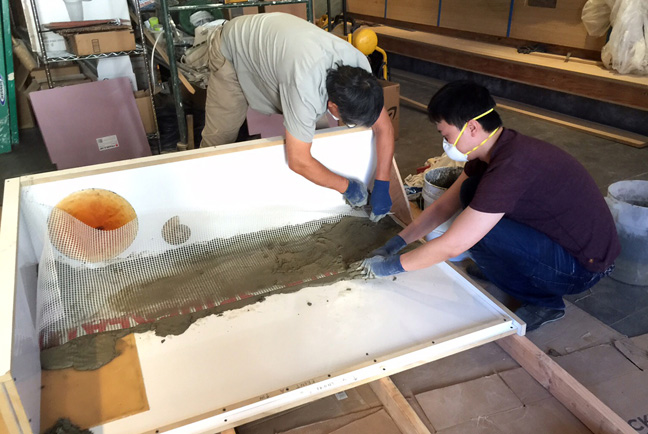
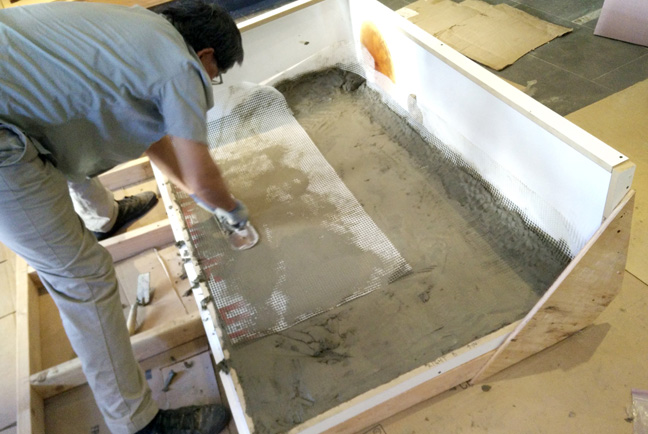
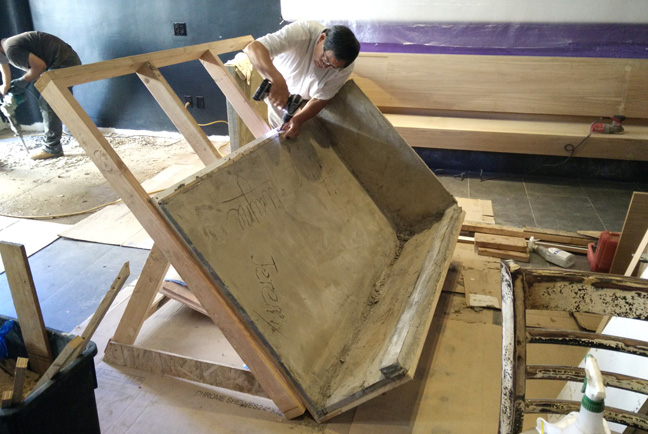
STEP 6: Reinforcement
Additional reinforcement in the form of Basalt Rebar is added in an X across the largest side.
More fiberglass mesh is troweled into the back side and then it's time to tilt the form and begin packing the other walls.
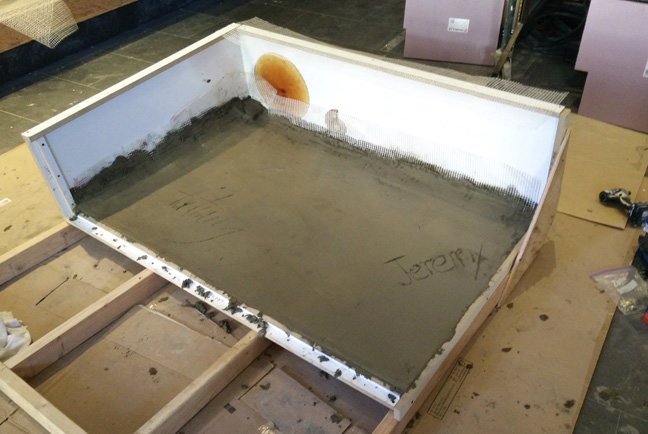
STEP 7: Tilt and Pack
To help keep the mix from sliding down when the form is tilted, a 3/4" piece of plywood is laid on the back side. Next the top of the form is packed, and then the last wall of the form.
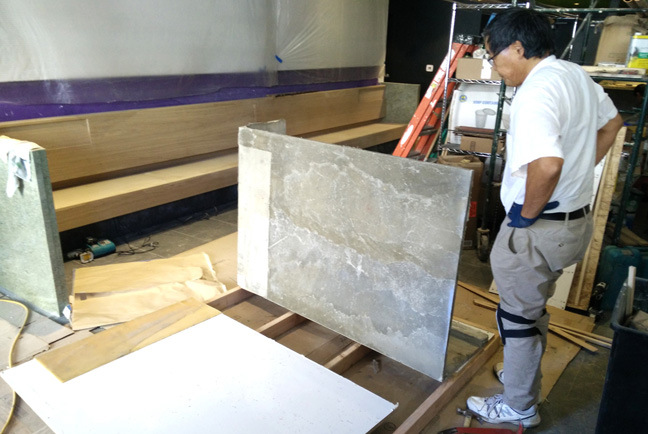
STEP 8: Demold
After the piece has cured for 4-5 days the form can be removed. The form walls are stripped and then the tilting jig is tipped down and the piece is lifted off the form.
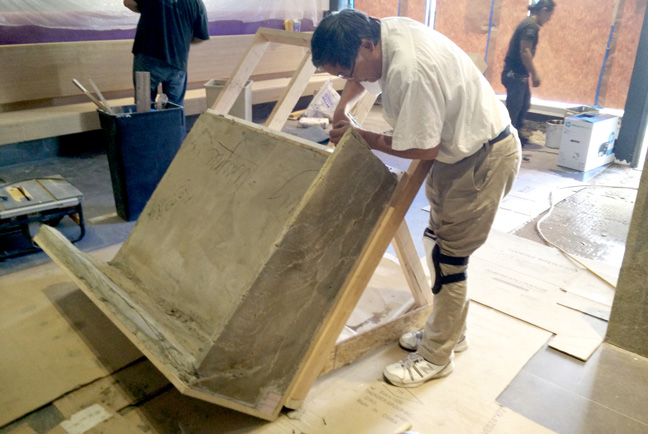
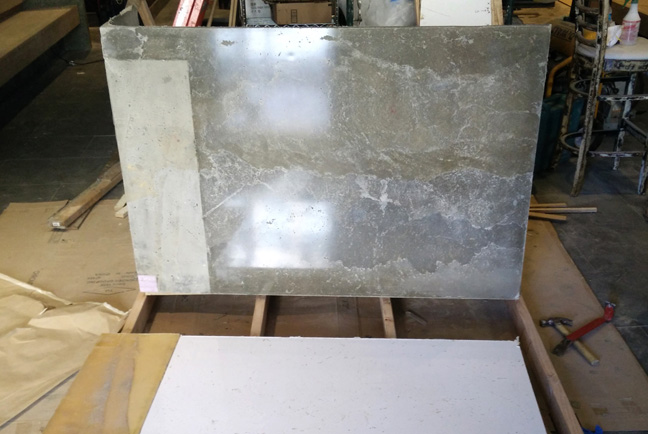
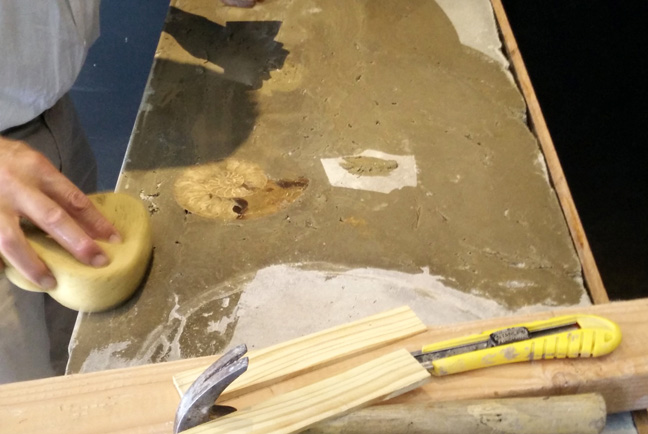
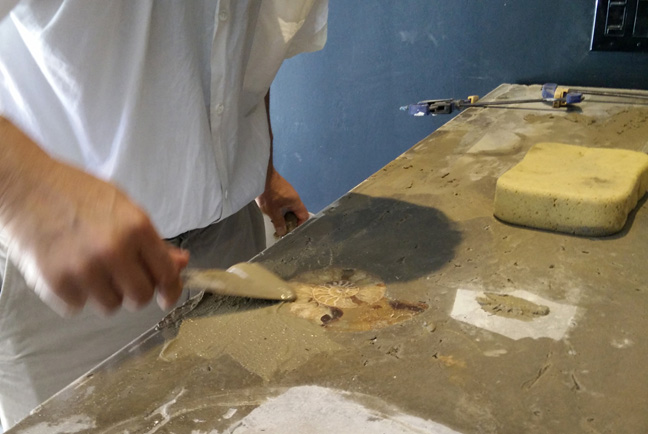
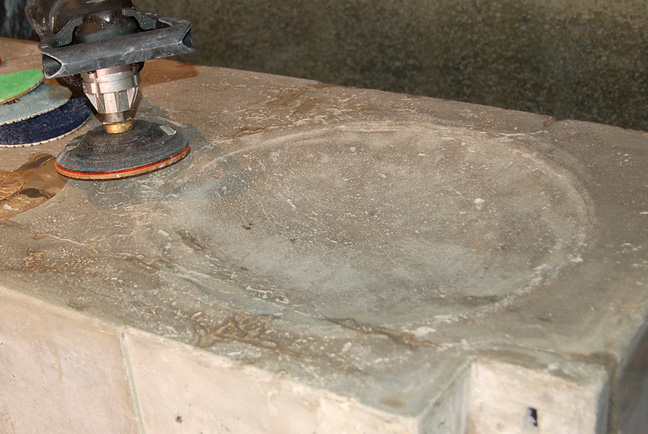
STEP 9: Slurry and Polish
The voids and holes on the top surface are filled with slurry and then lightly polished with a variable speed concrete polisher.
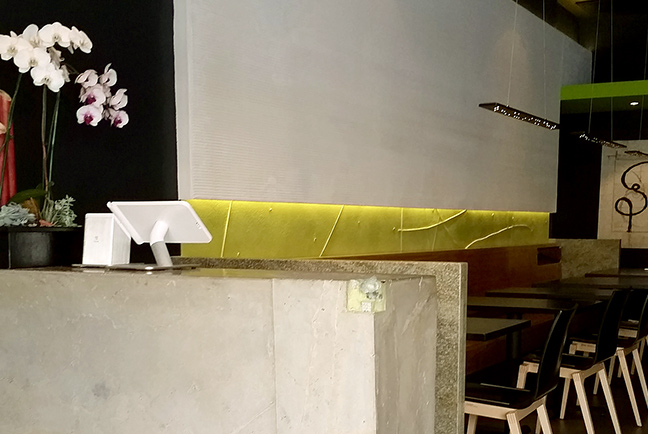
The Finished Piece:
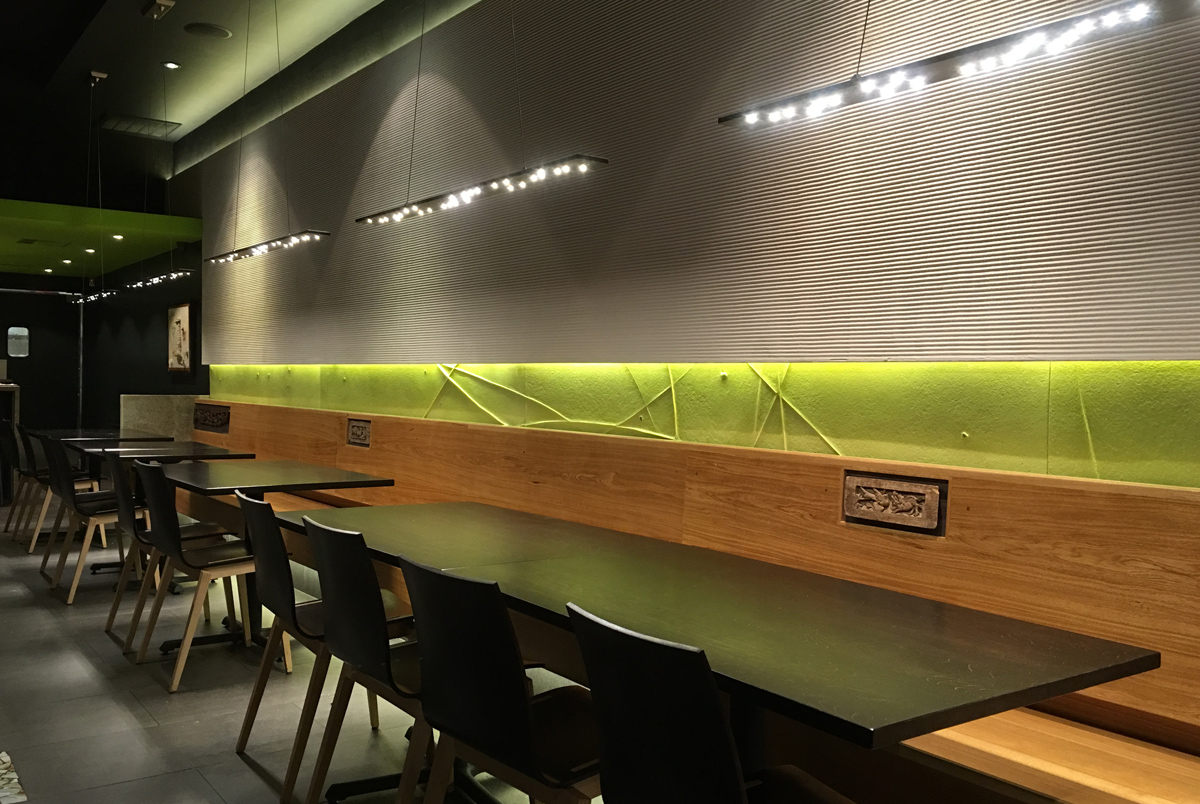
The hostess station is directly in front of the door and provides a place for patrons to be greeted as they enter the restaurant. The subdued color is in contrast to the bright green wall accents and the natural veined texture complements the hand troweled plaster walls.

Featured Projects